One of the most underused tools in any colorist's pencil case is the plain white colored pencil. Most people skip it — or only think to use it for adding bright white highlights at the very end. But a white pencil is actually one of the most powerful blending tools you have, and learning to use it mid-process will completely change the quality of your finished work.
Watch: White Pencil Blending Technique
See this technique in action before you try it yourself — it's much easier to understand once you see what the white pencil actually does on the page.
What Does a White Pencil Actually Do?
A white colored pencil does three distinct things when applied over existing color layers:
- Blends and softens — the white pigment fills the gaps between color particles, smoothing the surface and reducing visible pencil strokes
- Lightens — it gently dilutes darker colors, shifting them toward a lighter, milkier version of themselves
- Burnishes — with heavy pressure, it compresses and fuses all the layers below into a smooth, almost waxy finish that catches light differently than unburnished color
The key is understanding which of these effects you want in a given area, and adjusting your pressure accordingly.
Blending with Light Pressure
The most useful application of white pencil in everyday coloring is as a mid-process blending tool. After you've laid down two or three light layers of color in a transition zone, take your white pencil and — using very light pressure — apply small circular strokes over the overlapping area where your colors meet.
The white pigment fills the tiny tooth gaps between color layers and creates a smoother transition. Think of it as the equivalent of blending stump in graphite drawing. You're not trying to add white color to the image — you're using the pencil mechanically to merge what's already there.
Burnishing with Heavy Pressure
Burnishing is a different technique with a different goal. Here you apply the white pencil with significant pressure — firm enough to feel the pencil compressing the paper surface slightly. This fuses all the color layers together into a unified, smooth, almost shiny finish.
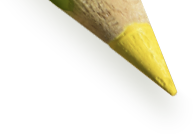
Burnished areas look fundamentally different from unburnished ones: they have a luminous, polished quality. Use burnishing in areas you've fully built up with color and are ready to finalize. It works particularly well on smooth, hard surfaces in your image — petals, glass, metal, water.
Once an area is burnished, you cannot add more layers on top — the tooth is filled and pigment won't adhere. So burnish only when you're completely happy with the color underneath.
Adding Highlights
This is the use most colorists already know — pressing the white pencil firmly onto an uncolored or lightly colored area to create a bright highlight. On darker papers or over dark base layers, this creates a stark, striking light source effect.
For softer highlights, apply the white pencil first (before any other color) and then layer your color over it. The color will sit differently over white pigment than over bare paper, creating a naturally lighter section without a hard edge.
White Pencil vs. Colorless Blender
A colorless blender pencil (like the Prismacolor Blender) works similarly to a white pencil but adds no pigment of its own. Here's when to use each:
| Situation | Use White Pencil | Use Colorless Blender |
|---|---|---|
| Blending in light areas | Yes — adds luminosity | Yes — keeps color pure |
| Blending in dark areas | Avoid — will lighten too much | Yes — blends without color shift |
| Adding highlights | Yes | No |
| Burnishing a finished area | Yes — adds sheen | Yes — preserves exact color |
| Softening edges | Only in lighter zones | Yes — anywhere |
The Best White Pencils for Blending
- Prismacolor Premier White — soft, waxy core that blends and burnishes beautifully. The go-to for most colorists.
- Faber-Castell Polychromos White — harder core, more precise, great for lighter blending without as much pigment deposit.
- Derwent Coloursoft White — extremely soft and buttery, ideal for burnishing large areas quickly.
- Caran d'Ache Pablo White — premium option with excellent lightfastness and smooth application.
Practice Exercise
The best way to understand white pencil blending is to do a quick test before applying it to a piece you care about. On a scrap of drawing paper: lay down a square of red, a square of blue, and overlap them in the middle to create a purple transition zone. Then apply your white pencil over the transition zone with light pressure. Watch the two colors blend and soften. Then press harder on one small section and see how the burnishing changes the surface. Five minutes of testing teaches you more than an hour of reading.
Ready to try these techniques on a real piece? Our complete colored pencil blending guide covers the full layering process from start to finish. And if you want to explore what paper works best for colored pencil blending, that guide has everything you need to make the right choice.